Field recording · FIELD GUIDE
Recording interviews in noisy places: from mic placement to delivery
You may not get a second take in the field. Start with a ten-minute setup, learn to tell noise problems apart, make a backup, and judge intelligibility before silence.
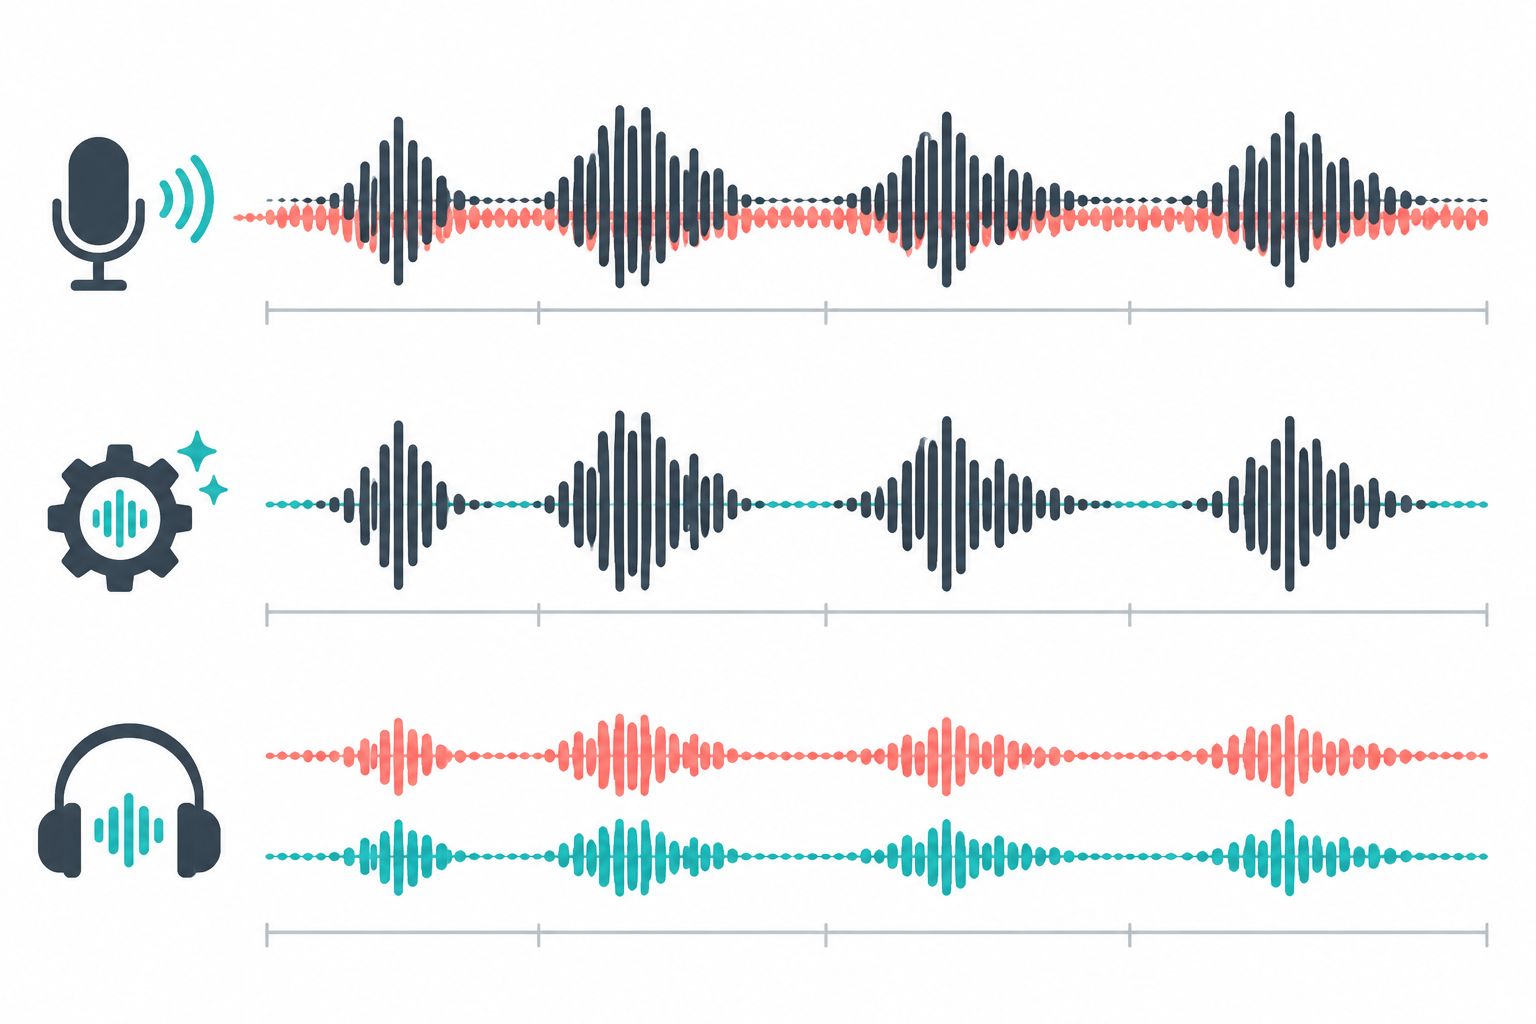
A 20-second sample. Equipment and location sound enter the microphone along with speech.
The same sample processed with the QuietTake web tool. This example does not predict results for every recording.
Identify the problem before processing
When a recording sounds noisy, do not reach for denoising immediately. A steady air conditioner, fan or road bed stays under the whole take. A horn, door slam or cheer is a short event. Room reflections stretch the end of a sentence. Wind hitting a microphone creates low-frequency bursts, while clipping is distortion already baked into the recording. Several problems can happen at once, but they need different responses.
Listen to the original from beginning to end on headphones and note the moments that make speech hardest to understand. Label them as speech being masked, steady background, level changes, or pops and distortion. Those notes help you decide whether to record again, repair one short section or test a denoising tool. Do not treat every trace of location ambience as a defect just because you want silence.
Software cannot reconstruct a complete sentence when speech is unintelligible, completely covered by another sound, or badly clipped. Keep the original and look for a second microphone, a camera backup track or a separate interviewer recording. Post-production can improve audibility; it cannot restore information the microphone never captured.
Walk the location before the interview
Before the guest arrives, stand at the planned recording position and listen quietly for a minute. Air vents, refrigerator compressors, projectors, traffic and footfall can all reach the microphone. The most attractive background is not always the best recording spot: glass walls, tile and empty corridors reflect speech; crowds add conversation; and a roadside position may be interrupted every few seconds.
Move away from steady noise where possible, and place the speaker with their back toward the main source. Indoors, switch off only equipment that can be turned off safely and without disrupting work. Move objects that can resonate on the table and avoid large bare windows or hard walls. Do not cover a ventilation opening or microphone with a blanket in the name of soundproofing. Soft furnishings reduce reflections; they do not make a room silent.
Record a 20-second test before the interview. Ask the speaker to use their normal voice, then say a sentence with the emphasis they might use in an answer. Check clarity, clothing rustle, cable taps and regular machine noise together. The test does not need to sound like a studio. It needs to catch a problem that could spoil the whole take.
Microphone distance often matters more than price
A microphone does not know which voice is important and which background sound is unwanted. The farther it is from the speaker, the more room and location sound it usually captures; moving it closer tends to make direct speech more prominent. Shure's recording and placement guidance also recommends starting close to the desired source while listening for how the microphone and source behave in that particular setup. Read Shure's microphone placement guidance.
A handheld microphone can start about a hand's width from the mouth, but that is a test position, not a specification. Too close can exaggerate plosives, sibilance and proximity bass; too far raises ambience and reflections. Secure a lavalier where clothing is unlikely to cover it, with enough cable slack for movement. Aim a shotgun microphone at the speaking area, and watch for people moving off-axis just outside the frame.
With two people, do not put one microphone exactly between them and stop checking. Head turns, posture, table reflections and their different distances can change level. Separate mics are preferable when available. With one mic, settle both people into their interview positions, ask each to speak and listen for whether the farther person remains clear. Record a new test after every move instead of judging placement from the screen.
On a phone, check microphone orientation and the input selected by the recording app. A case, finger, cable or adapter can block an opening. A phone on a table also picks up impacts; use a stable stand or soft isolation without wrapping the device. For wireless mics, check batteries, receiver connection and interference, and keep a second recording path for an important interview.
Monitor specific things, not just the meter
Use closed-back headphones and listen to the recording instead of watching the level bars alone. Does the noise rise during a pause? Does the voice get distant when the speaker turns? Does a collar rub with every breath? Does the cable hit the table edge? These questions lead to practical adjustments faster than asking whether the sound feels “professional.”
If the recorder supports stereo, make sure both channels work. Sound on only one side can point to a cable, adapter or input setting problem. Automatic gain on a phone may raise background noise during pauses, so check quiet sections rather than only the loudest sentence. A peak meter is a warning, not a clarity score. If clipping appears, lower input gain and test again.
The interviewer and sound operator can monitor different things: the interviewer follows the conversation, while the operator watches for noise, pops, dropouts and battery. If you are alone, stabilize the mic first, then watch level without staring at the waveform so long that you miss the guest's answer. Agree on a simple rule: if monitoring finds a persistent fault, pause and repeat the last answer instead of discovering after the interview that nothing was recorded.
Keep a backup, room tone and clear file names
Keep the original and a separate backup of an important interview. With multiple devices, clap or say a time marker after recording begins so the tracks can be aligned later. Leave a few seconds at the start and end to reduce the risk of cutting a consonant or breath. Do not keep the only copy on one card or phone: copy it to another medium after the shoot, then spot-check the beginning, middle and end.
You can record a short section of room tone with nobody speaking, but keep the equipment and microphone position unchanged. It helps you notice how the background changes and may provide a continuous ambience for editing. It is not proof that software can perfectly separate speech and noise, and it should not be used to invent a location sound that was not there. If the room changed or a device was switched off, the before-and-after tone is different.
Name files with a date, interview code, camera or mic, role and version, for example 20261027_interviewA_camB_original. A real name in a filename can itself expose a sensitive project, so use the agreed code. Store original, edit and cleaned versions separately and clearly enough that nobody overwrites the only original with an output.
Test a short section before cleaning the full take
Duplicate the working file, then test ten to thirty seconds that include speech, a pause and the noise you want to address. Do not judge from the cleanest sentence. Compare the same moment before and after at the same headphone level. Listen for consonants, names, short words, sentence endings, breaths and pauses. If the background falls but the voice turns watery, thin, metallic or broken, the processing is too strong.
In QuietTake's audio noise removal tool, test a short working copy before deciding whether to process the full recording. Open the audio noise removal tool. Do not overwrite the original, and do not assume the strongest setting is best. If ambience is part of the story, light processing can sound more natural than silence. When an interview cannot be repeated, keeping a little steady background is better than swallowing a quiet word.
If a sudden sound affects only one section, make the edit first and process that section carefully. Listen at the joins for a change in ambience. Different microphones or distances can change voice tone, so one strong setting across the whole recording may make sections jump. Clean obvious coughs, mic bumps and long pauses, then balance levels and export. Save a new version at each stage so you can return to the more natural one.
Test difficult locations separately
Wind is not like an air conditioner. It often arrives as sudden low-frequency impacts rather than an even bed. Fit a windscreen, change microphone direction, find shelter and record another test. If the wind keeps changing, a quiet test does not predict the interview. A canopy, corner or vehicle may block wind while adding reflections or resonance; listen again whenever the position changes.
At an event, conversation, music and crowd sound change over time. Position the interview near the event but not directly in front of a loudspeaker, and keep the guest's microphone close. If ambience tells part of the story, removing all of it can disconnect picture and sound. Edit out sections that mask speech, keep a suitable amount elsewhere and make sure the main point stays understandable.
With two mics or recorders, make a clear sync mark and monitor each path. Several mics capture one another, and a small timing offset can sound like an echo or comb filtering. Align the clap, then compare consonants. Before muting an unused channel, confirm it does not contain useful speech. Do not ignore clock drift just because the waveforms line up at the start.
For a phone backup, avoid calls and notification sounds, check storage, the external mic connection and app permissions. Put the phone somewhere it will not be bumped; record a test and immediately confirm that the file exists and the chosen mic is being used. A backup mic may be farther from the guest, so it may save the content during a failure without being a direct substitute for the main track.
When the interview allows it, leave a second of quiet between short questions. A pause helps locate edit points and gives the speaker a moment to think. Do not ask the guest to repeat a full answer in an identical tone unless you need a pickup line; a natural answer usually contains more information than a mechanical repeat. The host repeating a question may also be necessary context, so it is not always expendable.
Review the full export without watching the timeline
After export, close the editor and listen to the entire piece. Check that an edit has not cut off a sentence opening, made a pronoun lose its context, changed tone at a join or broken the continuity of room sound. Then check the picture for sync, lip movement and captions. If possible, ask a teammate to compare two versions without telling them which one was processed. “Quieter” does not automatically mean “clearer.”
Reopen the actual exported file in a player and confirm duration, channels, codec and ending. For video, check sync at the beginning and end. For audio delivery, check sample rate and channel count against the brief. A social-platform preview is not a master; a platform may compress the file or change its level again.
Keep the original, edit project, final output and a brief processing note. Record version, tool, date, time ranges changed and who reviewed the result. It should answer which file is ready to publish, how to return to the original and whether captions were checked, without becoming a technical report. Follow the project's access rules for backups of unpublished interviews.
Field checklist
- Listen at the location for one minute and find steady noise, reflective surfaces and a backup position.
- Place the microphone close enough without obstructing the interview; check direction, clothing and cables.
- Record a normal-volume test and listen to pauses, consonants and pops on headphones.
- Check for clipping, battery, storage and a second recording path.
- Use a clap or spoken marker to sync cameras; back up the take and spot-check it immediately.
- Test a representative section before processing, keep the original and check word endings and voice texture.
- Listen to the complete export and verify sync, format and filename.
Limits and further reading
The goal is not to make every recording sound like a studio. It is to keep important speech clear, natural and credible. In a difficult environment, microphone distance, direction and a repeated answer can matter more than an algorithm. Severe clipping, a distant quiet voice, overlapping speakers or speech completely covered by noise may not be recoverable. Plan a human review for anything you publish, and keep the amount of location sound that suits the story.
Further reading: Shure: microphone choice and placement; Shure: recording and mixing vocals; Adobe: preview speech enhancement by scenario.